Saturday, February 27, 2010

Sweet and Froggy

What a fun month and so many fantastic digis to play with! I've got a couple of projects to share with you on my last post as a guest designer for Sweet n Sassy Digis. My head is still spinning from trying to decide what fantastic images to use. There are just so many to choose from!
There's this widow at our church that my husband has a soft spot for, so I wanted to put together a little something sweet he could give her for Easter. I think he will enjoy giving it to her more than she'll enjoy the gift itself but then that's usually the case with gift giving. I created a candy bar wrap for a one of those large chocolate bars.
I used the Christ Arose set which has this beautiful image, the sentiment I used, plus several other sentiments. I know the robes on the cross are usually colored with royal purple, but I wanted to use the scarlet to symbolize the blood that was shed on the cross. I colored the image with my copics and prisma pencils. There's no real trick to the wrap. I just measured the candy bar and scored my card stock appropriately. I used a velcro closure to keep it closed.
The Thursday Digi Day Challenge at SNR this week was "silly for stripes". I love these challenges but just have a very hard time getting them finished on Thursday. It's that day job I have that's slowing me down! Anyway, a day late and a dollar short, I wanted to show you the card I created for the challenge.
This card uses the Fenton Frog image which you can pick up for less than a dollar and that's a lot of cute for less than a buck. There's lots of texture on this one. You can't tell it very well in the picture but the floral paper has glazed flowers on it, the prima flowers have chunky glitter on them, and the ribbon is fringed.
Can you believe February is gone? Spring will be here before we know it, so keep coloring all those beautiful flowers to tide us over until the real thing arrives!
Project Recipe
(Candy Bar Wrap)
Paper: SU Chocolate Chip CS, CTMH That's Amore PP, PTI White and Scarlet Jewel CS
Tools: Cuttlebug, Spellbinders Classic and Scalloped Circles Nestabilities dies, SU Scallop Trim border punch, copic markers, prisma pencils
Embellishments: SU Pretty in Pink Satin ribbon, Kaiser Pearls, Prima Say it in Crystals
(Card)
Paper: PTI Spring Rain, Lemon Tart, and White CS SU Taken With Teal CS, DCWV Cafe Mediterranean Matstack
Tools: Cuttlebug, Spellbinders Classic Squares and tags Nestabilities dies, copic markers, prisma pencils
Embellishments: Prima Daisy Mix flowers, Michaels Light Blue ribbon

Thursday, February 25, 2010

Punchin Up the Digis

I get so many ideas for cards and projects throughout the day, but I forget about 90% before I ever start crafting. I've even tried writing them down as they occur and this helps, but sometimes I can't remember what my notes meant or I lose my notes! But I saw a card on the talented Cheryl Gorka's blog She Stamps which reminded of a technique I had been wanting to try.Cheryl used Flower Soft (something else I need to remember to work with some more), but I had been wanting to take one of the branches from the LSS Birds and Branches digital stamp set and add punched flowers to it.
This was so easy and I loved adding the flowers. I just sized the branch to fit the card, printed it out, and colored with copics. I, then, just punched a few flowers with a small flower punch, added the centers from a retired SU Simply Scrappin kit, and glued the flowers to the branch. I used a similar but larger punch to accent the sentiment which is from a PTI set. The two brown stripes are also from the Simply Scrappin kit.
Wonder what the talented ladies of the Lindsay's Stamp Stuff design team have been up to this week? Be sure to go find out and don't miss Lindsay's blog. She's got some free goodies for you today in addition to the great eye candy!
Project Recipe
Paper: GinaK White Pure Luxury CS, SU Rose Red DSP
Stamps: LSS Birds and Branches, PTI Vintage Picnic Sentiments
Tools: EK Success flower punches, copic markers
Embellishments: SU Simply Scrappin kit, PTI Vintage Holiday Mix button

Saturday, February 20, 2010

Springtime Crafting

Spring cleaning....Yuk! But, spring crafting is another thing altogether! I've got three spring fresh projects that I created for my post at the Sweet N Sassy Digi Blog. If you haven't stopped by there today, please go visit me on that blog and give a little shout out if you like what you see. I've really worked hard to showcase the wonderful digi stamps from Sweet n Sassy!
First up is a little project I made for my nephew who had a birthday this month. I used the SNS set Early Bird for a little "tongue-in-cheek" gag gift that I hope gives him a little chuckle even if it is kind of corny!
On the card's inside it reads "So I thought I'd bring you dinner!" Now what fourteen year old wouldn't crave a bucket of worms! To match the gummy worms in the bucket, I used red and green stickles on the worm in the bird's mouth. Scrumptious!
Last year we were gripped by a horrible drought and basically had no spring. I really missed seeing the beautiful wildflowers on the sides of the road. This year, thanks to winter rains, should be much more colorful, but to help with the flower crop, I put together this little gift packet of flower seeds.Here's the inside:
I used the Springtime Blessings Sentiment set inside and Kate Planting on the outside. This is tied closed with a bow. The image is colored with copics and prisma pencils.
I wish I were Kate. I'm ready to dig up all the plants killed by the freeze and put a whole fresh crop of plants in the ground....soon!
Finally, I want to share a bookmark I made with the very beautiful Bible image. The scripture is John 3:16. The Bible is surrounded by lovely Easter Lilies. These bookmarks would make great gifts for a Bible study group or Sunday school class. I colored the image with copics and prisma pencils and cut out the image with Spellbinders Oval Nestabilities. Then, I mounted it on the bookmark after adding some patterned paper and a little sewing.
If the winter blahs have you down, be sure to head over to Sweet n Sassy for a Springtime pick-me-up! You'll be feeling warm and sunny in no time at all with all the crafting you can do with these adorable and inexpensive digital stamps and stamp sets. Even if it's not time to put flowers in the ground, it's never too early to put some on a card!
Project Recipe
(Bird and Worms)
Paper: DCWV Citrus Stack, PTI Lemon Tart
Tools: copic markers, Prisma pencils, SU Modern Label punch, SU Modern Label die cut, Paper Shapers corner rounder
Embellishments: PTI Enchanted Evening grosgrain ribbon, PTI Vintage Button, twine, Ranger Stickles
(Seed Gift Packet)
Paper: PTI Kraft and Enchanted Evening CS, GinaK White Pure Luxury CS, K&Company Classic K Bailey PP
Tools: Cuttlebug, Spellbinders Deckled Rectangle Nestability dies, Copic markers, Prisma pencils, Martha Stewart Arch Lattice, EK Success circle and scalloped circle punches
Embellishments: PTI Enchanted Evening Satin ribbon, Making Memories Blossoms and Buttons felt and paper flowers and button, Prima Say It With Pearls Swirls Cream
(Bible Bookmark)
Paper: PTI Lemon Tart and New Leaf CS, K&Company Designer Mat Pad PP, GinaK White Pure Luxury CS
Stamps: SNS Bible[1]
Tools: cuttlebug, Spellbinders Classic Oval Nestabilities dies, Copic markers, Prisma pencils, sewing machine, SU horizontal slot punch, corner rounder
Embellishments: SU Black Striped Grosgrain ribbon

Thursday, February 18, 2010

Gone to the Birds

Hope you are in the mood for lots of eye candy and little chatter today. My little fingers are sore from all the typing I've had to do lately for my classes that I'm taking. (Actually, my fingers are fine. It's my brain that has shut down.) If I don't explain something very well or thoroughly, please leave a question in the comment section and I'll try to get back to answer any questions you may have. I'm too tired to think right now!
Lindsay has released a new set that is absolutely perfect for spring. And after three days of sunshine, I'm starting to think Spring may arrive one of these days! All the images for my three projects are from the LSS Birds and Branches digital stamp set.
First up is a card I created using small versions of three separate stamps which I then colored with copics and prisma pencils and then punched with a 1" square punch offsetting the image so that only a glimpse, not the whole image, is showing.
I tried to keep this clean and sunny!
Next I created a little wall hanging with the chick image in the set. I created two sizes of the same image so that there is a big chick with three "baby" chicks following behind. I used some SU paper that has clouds and then use my Cricut to create a scalloped circle mat. The cloud paper was originally going to be part of a different project but I really liked the "sunny" feel it gave the whole project.
Again I used my copics and prisma pencils to color in the image. Then, I found the sentiment in a PTI stamp set that was just too cute not to use. The buttons are a sweet extra touch.
Finally, have you seen all the birdhouses being made with SU's new Milk Carton Sizzix die? I have that die and will definitely be using it for an upcoming project, but I wanted to make a much larger birdhouse, so I used my Cricut, SCAL software and a Box Font to create my milk carton. Look at the size comparison.
Of course, with my Cricut I can resize the project and make it as small as the Stampin' Up milk carton. The advantage of the Sizzix die over the Cricut/SCAL cut is the scoring. The Sizzix die scores everything for you. The cut file gives you little marks but you have to do the scoring yourself, not hard, just more time-consuming. But I do love the ability to resize as needed! Look at what I created with my "milk carton".
I added a roof with some yellow cardstock that I embossed in with a cuttlebug folder. I punched the edges of the roof with my SU scalloped edge border punch. I attached the roof to the top of the closed milk carton and then punched out the birds nest from the Birds and Branches stamp set.
I hope these projects make you feel Spring's imminent approach. Be sure to check out what the rest of the LSS design team has been up to this week. I think we are all ready for warmer, sunnier days, so you are likely to see much more of the Birds and Branches stamp set!

Monday, February 15, 2010

SSS43

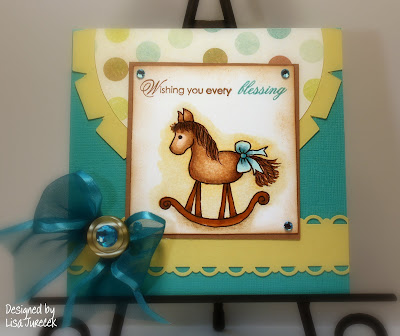
Nicole at The Sweet Stop Challenge Blog left some really sweet comments on my blog the other day and invited me to  try one of her challenges. I'm not good with challenges. I'm too OCD and try to match everything up EXACTLY to the sketch. I always admire crafters who look at the challenge as a jumping off point and then come up with a creative take on it. But armed with Nicole's praises, I decided to give this one a try.
Yep, looks pretty much exactly like the sketch but I like the sketch so that's a good thing! I colored the cute Rocking Horse image with my copics and prisma pencils. Then, I recreated the horse's bow with my own bow made from some sheer ribbon I found at Walmart. And, yea! I used my new SU Scallop Trim border punch.
I agonized over this one, but I really liked the colors that came together and had fun trying to create all the pieces so I could "match" the challenge sketch. I may have to try another one soon!
Project Recipe
Paper: SU Bermuda Bay Textured CS, SU Close To Cocoa CS, PTI Spring Moss CS, Gina K White Pure Luxury CS, My Mind's Eye PP
Stamps: SNS Rocking Horse, PTI Heartfelt Basics (sentiment)
Tools: Cricut, Accent Essentials Cartridge, SU Scallop Trim Border punch, copic markers, prisma pencils, bow easy
Embellishments: PTI Holiday Mix button, Doodlebug Designs jewels, Offrey sheer ribbon

Saturday, February 13, 2010

Sew Special Purse

There are so many great digital stamps coming out of Sweet N Sassy I just can't keep up! I want them all! But some of my favorite images are of Cocoa. I love how he peeks out from behind things. So adorable!
I had a totally different project in mind when I first saw this Sew Happy Cocoa image. I was going to actually do some sewing for one thing, but then I found a miniature sewing kit at the dollar store and was looking for a way to package that up and that's how this little Sew Special Purse was created!
I don't know that I would give a small sewing kit to a real seamstress, but this would be a great gift for a grad going off to college. Put a little cash in the purse along with the safety pins, needles, and thread and the graduate is ready for minor clothing emergencies anyway. The sentiment is also perfect for a special graduate. It's from the Sew Many Thoughts sentiment set.
I added a couple of tissue paper flowers and some buttons to give the project a homespun feel. The "purse" is from a template I purchased online. I normally am not crazy about orange, but I really liked it with this project.  Be sure to go check out all the latest Cocoa stamps at Sweet N Sassy. There are some really "sweet" ones available. Happy Valentine's Day!
Project Recipe
Paper: SU Bermuda Bay CS, SU Welcome Neighbor DSP, GinaK White Pure Luxury CS
Tools: PTI Purse-onality Clutch template, SU Small and Large Tag punches, SU Scallop Circle Punch, cuttlebug, Spellbinders Classic Circle dies, copic markers, Prisma pencils
Embellishments: PTI Holiday Mix Vintage Button Collection, PTI twine, Paper Studio brads, PTI Orange Zest Satin Ribbon

Thursday, February 11, 2010

Almost Valentine's

I've been busy as Cupid trying to get all my Valentine's gifts ready for Friday. Here's a peek at what I'm taking to the school for all our staff members. I decided to go a little non-traditional on the colors focusing in on a soft melon color rather than pink or red.
LSS has a great cut file for these little bags.The set of four different bags is called Pretty Favor SVG. I used my Cricut and SCAL software to cut these out. A couple of the bags have a decorative edge, but I decided to use the plain one and punch the top edge out with my Fiskars border punch. I resized the bags and was able to get four bags out of one 12X12 piece of cardstock.
These are pretty small but I needed forty and didn't want to go broke filling them, so I purposely kept them small. However, my principal has a sweet tooth and always gives me a hard time if the treats I hand out don't have enough candy in them. So, I made a special bag for him that I could really fill with sugary treats!
I used a different bag from the same set. I didn't want it too frilly so I added a stamp from the LSS Love Grows Here stamp set and a little bit of ribbon. Simple but filled with delicious calories!
There's still time to get your Valentine a card made. Head on over to Lindsay's Stamp Stuff. She's running a great special right now. I even know of some folks who are already working on their Christmas cards for next year. Wish I could do it, but the mood is long gone! Check out all the design team blogs. You're sure to find some great eye candy!

Project Recipe
Paper: DCWV The Whimsy Stack and Garden Party Stack
Tools: Cricut, SCAL, Pretty Favors SVG, Fiskars Apron Lace border punch, copic markers
Embellishments: various ribbons (PTI and Hobby Lobby)

Saturday, February 6, 2010

A Spring Preview

I'm making my first guest appearance over at SNS Digi Blog, so be sure to stop by over there and give me a shout out! I created three projects for my first post over there. I guess I was little overexcited, huh! But SNS released a slew of new images this week and I had so much fun creating projects to complement them.
The first project was created with Benjamin Bunny, who is the most adorable of creatures. He needs to make an appearance at every holiday: Halloween, Christmas, Rosh Hashana, all of them! But for this project, I geared him up for Easter.
I used the 3-D Mailbox Template from LSS to create this little mailbox for Benjamin to sit in front of and wait for his Easter presents to arrive. You can see this earlier post for more details on the mailbox and for another example of it, but I used the template with my Cricut and SCAL software.
Next, I used SNS One of a Kind set. It has one image and two special sentiments.
I finally broke out my Celtic Knot Embossing folder for this one which I thought paired nicely with my Martha Stewart Arch Lattice Border punch. After coloring the image with my copic markers and prisma pencils, I printed out the sentiment and punched it out with a one-inch circle punch. I used the sentiment for the center of my two flowers. Great card to give to someone truly special!
Then, I found this tutorial for the tote bag and created a pretty bag to hold some inexpensive bath salts and tablets. I used the elegant SNS Fluttering By image and sentiment to decorate this pretty bag.
I again colored the image with copics, cut it out with Nestabilities Label 4 dies, and sponged the edges. Then, I created this tissue paper flower with a rhinestone brad center. I love purses, especially paper purses!
Be sure to head straight to Sweet N Sassy Digis to see all of their great images.
Project Recipe
(Benjamin Bunny)
Paper: SU Parisian Breeze (retired), Paper Studio The Basics (Hobby Lobby), Blue cardstock (unknown), GinaK White Pure Luxury CS
Stamps: SNS Benjamin Bunny
Tools: Cricut, SCAL software, LSS 3-D Mailbox Template, cuttlebug, Spellbinders Label One Nestabilities dies, SU Eyelet Lace Border punch, heart punch (unknown), copics, prisma pencils
Embellishments: Paper Studio Designer Silk Flower Brads
(One of a Kind)
Paper: PTI Dark Chocolate CS, PTI Enchanted Evening CS, GinaK White Pure Luxury CS, Blue PP (unknown scrap)
Stamps: SNS One of a Kind
Tools: Cuttlebug, Celtic Knot embossing folder, Spellbinders Long Rectangle and Scalloped Long Rectangle Nestabilities diesMartha Stewart Arch Lattice border punch, EK Success 1-inch circle punch, copic markers, prisma pencils. Waterfall Stickles
Embellishments: Prima flower, Paper Studio flower, SU Certainly Celery ribbon
(Fluttering By Tote)
Paper: SU Sweet Nothings PP (retired), PTI Raspberry Fizz CS, SU Pretty in Pink CS, GinaK White Pure Luxury CS
Stamps: SNS Fluttering By
Tools: Cuttlebug, Spellbinders Labels Four Nestabilities dies, SU Tab punch, EK Success 2-inch Scallop Circle punch, copic markers, foam sponge brush
Embellishments: Paper Studio Rhinestone brads (clear and pink), Watermelon Stickles, PTI Raspberry Fizz Grosgrain ribbon, tissue paper

Thursday, February 4, 2010

Spring Flower Basket

It's raining again! Not a bad thing, I know. We need the rain, but still I miss sunshine (don't quote me on that this summer when I'm complaining about the heat!). Anyway, I was at Walmart the other day and just couldn't resist picking up one tiny little blooming plant. It's still too early for spring flowers, so I'm creating a garden in my craft room!
I've had the template for this cute picnic basket for a while now, but this is the first time I've actually used it. You can get the template at Papertrey Ink under My Timeless Templates.It was super easy to put together. I paired the great little basket with a very appropriate sentiment from Sweet N Sassy Digital Stamps. This is from the Springtime Blessing set. If you haven't been to SNS lately, you really need to go see all the new stuff. The new releases have me completely jonesing for Spring!
I used some buttons on the picnic basket handle and on the ribbon in order to meet the SNS Digi Day Challenge at SNR. Micki challenged us to use buttons on our project. Oh, and if you meet the challenge and post before Monday morning, there's a beautiful freebie in it for you!
Project Recipe
Paper: SU Blush Blossom CS, PTI Scarlet Jewel CS, DCWV Farmer's Market PP
Tools: Cuttlebug, Spellbinders Labels Four Nestabilities dies, PTI Pack a Picnic Template, Martha Stewart Arch Lattice border punch, SU Horizontal Slot punch
Embellishments: buttons, twine (PTI), PTI Sweet Blush Saddle stitched ribbon

Spring Planting

Is it spring yet? Another rainy, gray day here, but I'm ready for spring flowers. We lost several plants with a freeze we had earlier this winter, so we are going to have to replant a lot of areas of our flower beds, but realistically I know it's too early for that. So, I had to settle for digistamping planting season!
I grabbed my gardening tools from the LSS Digi Shop, colored them with copics and prisma pencils, then paired up some Wild Wasabi DSP (retired) with a little PTI Terracota Tile ribbon. I love this color combination. Here's a close up of the LSS Garden Tools:
Then, I created a pocket inside the card so I could tuck away some seeds. Now, I've helped someone get a little closer to spring in all its colorful glory.
How long do you have to wait for spring planting? Are you starting to feel cooped up in the house? Well, can't change the weather but grab some great colors and some cool digi stamps and color your way to a spring day! Don't forget LSS has a great every day special--spend $5 and get a free stamp. Also, be sure to check out Lindsay's blog. She always has an amazing project and usually she offers a freebie to go along with her inspiration. Then, run out and visit all the design team blogs and spread a little sunshine! We could all use it to get through these dreary winter days.
Project Recipe
Paper: White card base (Hobby Lobby), SU Wild Wasabi DSP, SU Wild Wasabi CS, GinaK White Pure Luxury CS
Stamps: LSS Garden Tools, PTI Everyday Button Bits (sentiment)
Tools: cuttlebug, Swiss Dots embossing folder, Fiskars Apron Lace border punch, Spellbinders Classic Circles Nestabilities dies, Spellbinders label die, SU Horizontal slot punch, copic markers, prisma pencils
Embellishments: PTI Terracotta Tile Dotted Satin Ribbon